Google Slides cheat sheet: How to get started
Need to build a slide presentation for a meeting, training, or other event? Google Slides is an easy-to-use web app that comes with essential tools and extras for creating and presenting slide decks. It stores your presentations in the cloud with Google Drive.
Anyone with a Google account can use Google Slides for free. It’s also available with Google Workspace — Google’s subscription-based collection of online office apps that includes Gmail, Google Docs, Google Sheets, and more. Slides works similarly for everybody, but users with business and enterprise Workspace plans get some advanced features.
This guide will help you become familiar with the Google Slides web interface and show you how to start or upload a presentation, collaborate with others on your presentation, and finally, present it to others. We’ll take a quick look at the Google Slides mobile apps for Android and iOS, too.
[ See more Google Workspace tips and tutorials ]
We’ll also cover a few Gemini (Google’s generative AI assistant) features that are now integrated with Google Slides. Gemini tools are available in Google Slides with a Google Workspace Business Standard or greater plan, a Google AI Pro or greater plan, or if you sign up for Google Workspace Labs with your Google account.
In this article:
- Create or open a presentation
- Learn the Slides interface
- Create and manage slides (with or without Gemini AI)
- Share and collaborate on a presentation
- Give a presentation
- Download and export a presentation
- Use the Google Slides mobile app
- Use keyboard shortcuts
Create or open a presentation
Log in to your Google or Workspace account. Then:
From the Google Slides home page: At the top of the page, you’ll see a “Start a new presentation” header, with a row of thumbnails underneath. To start a new, blank presentation, click the Blank presentation thumbnail.
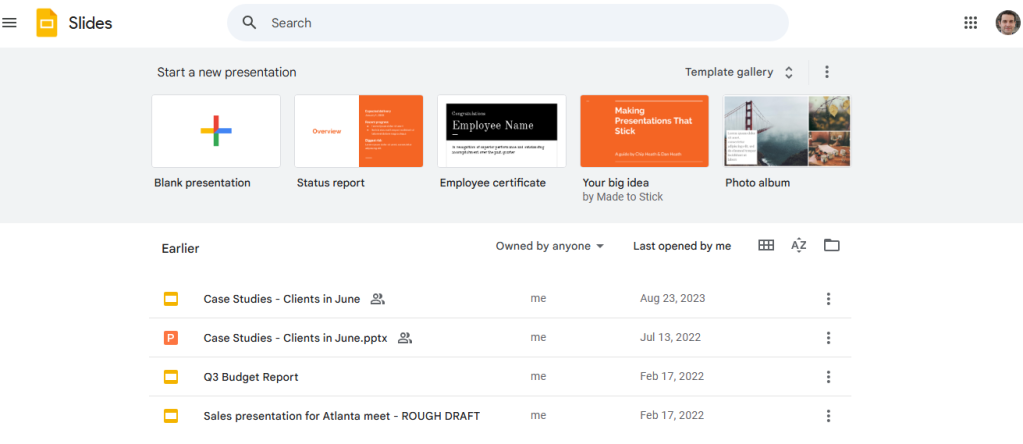
The Google Slides home page.
Howard Wen / Foundry
To start a new presentation in a template, select one of the thumbnails to the right or click Template gallery toward the upper-right corner, then on the page that appears, click the thumbnail for the template you want to use.
Below the “Start a new presentation” area you’ll see a list of presentations that are stored in your Google Drive or shared with you by other people. To open a presentation in this list, click it.
Note: This listing of presentations appears in reverse chronological order starting with the presentation you most recently opened. Click the AZ icon at the upper right of this list to change the sort order to Last modified by me, Last modified (by anyone), or in alphabetical order by presentation title. You can also browse to a specific folder by clicking the folder icon next to the “AZ” icon.
From the Google Drive home page: To start a new blank presentation, click the New button at the upper left of the screen and then click Google Slides.
If you want to select a template to start a new document: Click the New button, then move the pointer over the > to the right of “Google Slides” and select From a template. The Google Slides template gallery will open. Click a thumbnail to start a new presentation in that template.
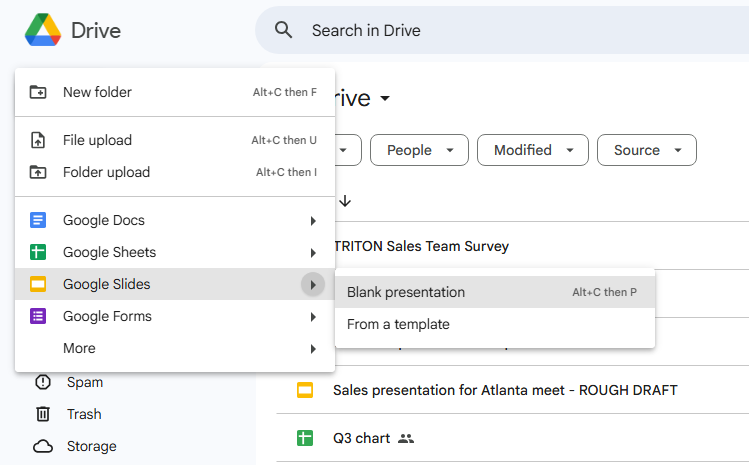
Creating a new presentation from Google Drive.
Howard Wen / Foundry
From the Google Slides or Drive home page: You also can use the search box at the top to find presentations in your Google Drive or shared with you. Enter words or numbers that may be in the presentation you’re looking for.
From your web browser’s address bar: You can immediately launch Google Slides with a new blank presentation by simply typing slides.new in the address bar of your web browser. (This works if you’re already signed in to your Google or Google Workspace account on the browser.)
Upload a PowerPoint presentation to Slides
You can edit a Microsoft PowerPoint presentation in Google Slides, but first you must upload it to Google Drive.
From the Google Slides home page: Click the folder icon (Open file picker) at the top right of the presentations list. On the panel that opens, click the Upload tab. Drag-and-drop your PowerPoint file (.ppt or .pptx) onto this panel, or browse your PC’s drive to select it. The file is saved to your Google Drive in Slides format and opens immediately in the Slides web app.
From the Google Drive home page: Click the New button, then File upload. Select the PowerPoint file from your PC’s drive and click Open. The file is saved to your Google Drive and retains its original formatting.
Google Slides supports the ability to edit PowerPoint .pptx files in their native format. You can edit and collaborate on a PowerPoint file right in Slides, with all changes made by you or your collaborators saved directly to the PowerPoint file.
To retain the PowerPoint format, though, you must upload the file through Google Drive. When you upload a Microsoft PowerPoint presentation through the Google Slides home page, it is automatically converted to the Slides file format.
When you upload a PowerPoint presentation through the Google Drive home page, on the other hand, it’s not automatically converted to Slides file format and will retain its format and .pptx file extension. In the files listing, PowerPoint files will be denoted with a “P” icon. When you open a PowerPoint presentation in Slides, you’ll see a “.PPTX” flag to the right of the presentation title.
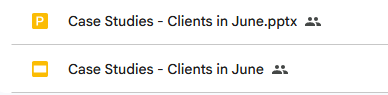
Native PowerPoint files show the PowerPoint icon (above) instead of the Google Slides icon (below).
Howard Wen / Foundry
If you want PowerPoint files to be automatically converted to Slides format when you upload them via Google Drive, click the gear icon at the upper-right corner of the Drive home page and select Settings from the drop-down menu. On the Settings page, scroll down to “Uploads” and check the checkbox marked Convert uploads to Google Docs editor format.
Learn the Slides interface When you open a new or existing presentation in Google Slides, its first slide appears in the main window. Here’s a breakdown of the toolbars, menus, and panes that appear around your presentation.
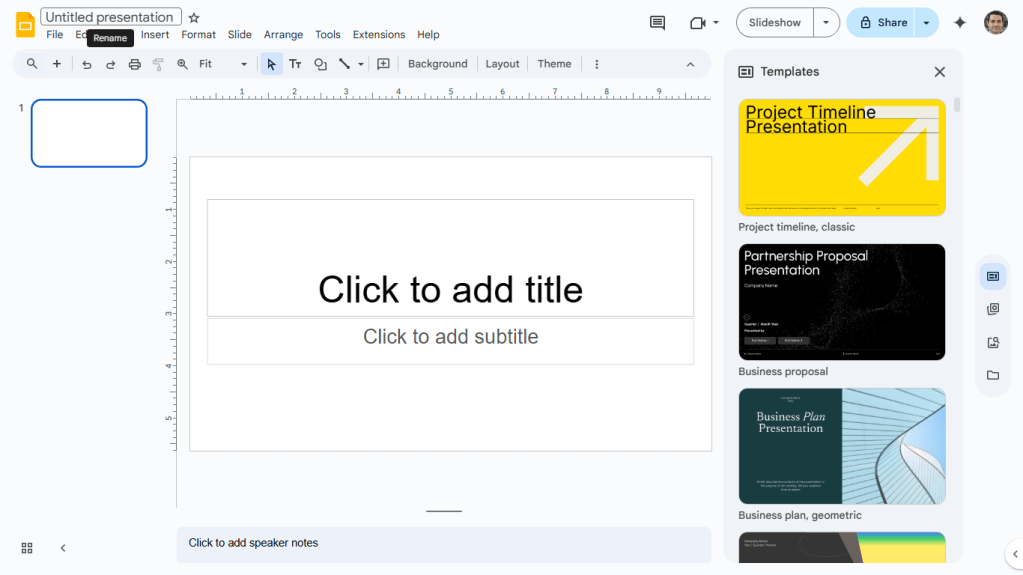
The Google Slides editing interface.
Howard Wen / Foundry
The left pane shows thumbnails of all the slides in your presentation. Click a thumbnail, and the slide it represents will appear in the main window, where you can edit it.
Your presentation’s title appears at the top left of the screen. To change it, click anywhere inside the title and start typing.
The menu bar below your presentation’s title has a set of tools for working with presentations.
- File: commands for taking action on the whole presentation, such as Print, Rename, and Share.
- Edit: standard editing commands such as Cut, Copy, Paste, Delete, Duplicate, and Find and replace.
- View: lists several ways you can view your slides as you design and edit them, including arranging them into a grid, previewing them as a slideshow, or zooming in on them. You can also watch the transition effect that takes place between slides when they’re played in a slideshow.
- Insert: lets you add objects such as charts, diagrams, pictures, tables, and text to your slides. You can also add links to YouTube videos or audio or video files that are stored in your Google Drive.
- Format: lets you change the look of your slides. Certain functions on this submenu become clickable depending on whether you’ve selected an image or text on a slide, or selected the slide itself.
- Slide: add, delete, or duplicate a slide that you’ve selected. You can also add a preset layout to a slide, change its background or theme color, or add and edit a transition effect that takes place between slides when your presentation is played as a slideshow.
- Arrange: tools that let you group or reorder objects on a slide in relation to another. For example, you can place an image behind another image, or group an image and a block of text together to make them easier to move at once.
- Tools: miscellaneous functions including recording a voice clip to go with a slide, running a spell checker, and seeing a list of objects in your presentation that are linked to other files.
- Extensions: find third-party apps that integrate with Slides and other Workspace apps
- Help: search for commands or get help for specific tasks
The toolbar directly above your presentation puts commonly used commands — such as adding slides, comments, objects (images, lines, shapes, text), backgrounds, and slide transition effects, or changing the slide’s layout or overall theme for your presentation — in easy reach. The buttons on this toolbar will change depending on whether you’ve selected an object on a slide or selected the slide itself.
Note that there is no Save command; Slides automatically saves any changes as you make them.
Speaker notes: Along the bottom of each slide you’ll see an area marked “Click to add speaker notes.” Here you can type in brief notes to remind yourself what to do or say when the slide is being shown during a presentation. When you show your presentation to an audience, only you will see these notes.
The right sidebar: When you start a new presentation or open an existing one, a sidebar may open automatically on the right side of screen. (You can also open it manually.) The sidebar can show one of several different panes to help you work with slideshows.
For example, the Templates pane lets you create preformatted slides from themed templates. And for users with access to Gemini, the Gemini pane is where you’ll work with the genAI assistant to create slides or images, rewrite content, and more.
The mini-toolbar: Along the far right of Slides is a vertical mini-toolbar with icons you can click to open various sidebar panes. We’ll go into more detail about using the mini-toolbar and sidebar below.
Create and manage slides
Here are the basic things to know about working with slides in a presentation.
Quick actions
Add a slide to your presentation: Click the + button at the left end of the toolbar above your presentation. A new blank slide is added in the default layout.
Apply or change a slide’s layout: Select the slide’s thumbnail in the left pane, then click Layout on the toolbar. On the panel that opens over the screen, select the layout you want to apply to this slide.
When you add more new slides, they’ll appear with the same layout as the previous one.
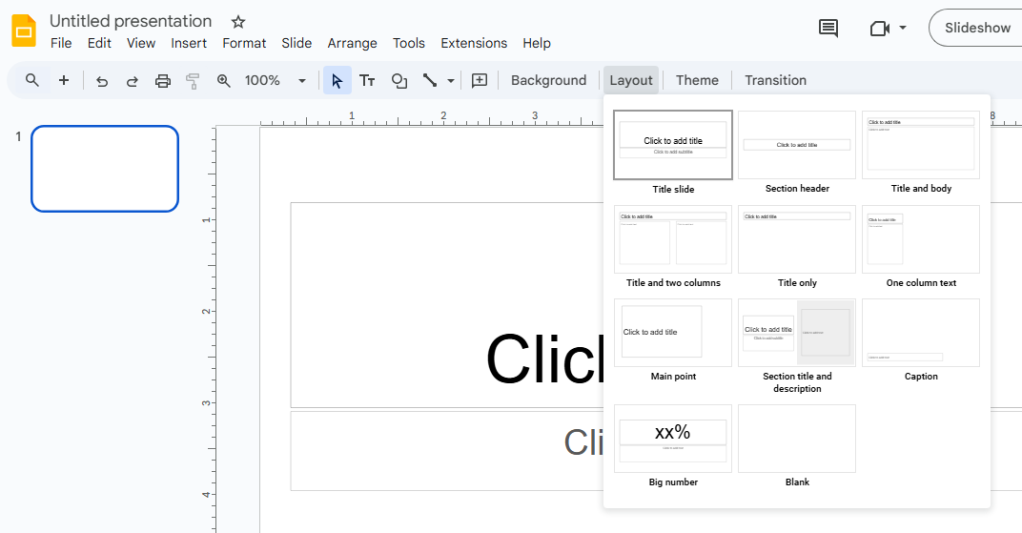
Click Layout on the toolbar to choose a layout for a slide.
Howard Wen / Foundry
Apply or change a slide’s background: Select the slide’s thumbnail in the left pane and click Background on the toolbar. On the panel that opens over the screen, you can change the slide’s background color or use an image file from your PC, webcam, Google Drive, Google Photos, or Google Images as the background.
Apply or change a slide’s transition: Select the slide’s thumbnail in the left pane and click Transition on the toolbar. The Motion pane will open in the sidebar along the right side of the screen. Here you can apply or change the animated transition effect that is played before this slide.
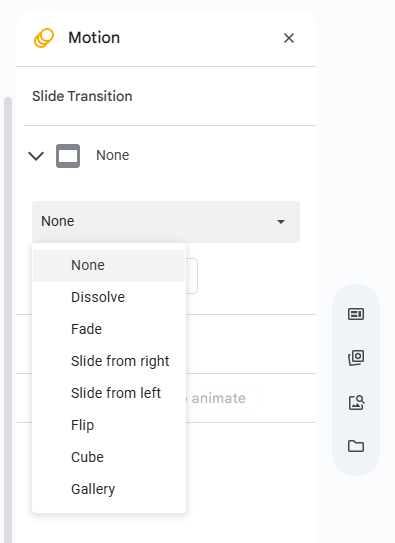
Choosing a transition style in the Motion pane.
Howard Wen / Foundry
Move a slide to a different spot in the slideshow sequence: Click and hold its thumbnail in the left pane, drag it up or down to another place in the sequence, and release it.
Delete a slide: Right-click its thumbnail in the left pane and select Delete from the pop-up menu. Alternatively, select its thumbnail and select Edit > Delete from the menu bar or press the Delete key.
Apply or change the presentation’s theme: Themes apply a set of colors, fonts, and other design elements to all the slides in a presentation, giving it a consistent look and feel. Click Theme in the toolbar above your presentation to open the Themes pane in the right sidebar. Click a thumbnail for a theme, and all the slides will be changed to that theme.
Create slides from a template
As covered above, when you first create a slideshow, you can select a template to build it in, such as Consulting Proposal. When you do, an entire presentation is created in that template, and you then go through and add your own information to the slides, rearrange slides, delete slides you don’t want, and so on.
But you can also use templates on a slide-by-slide basis. This method is useful when you want to use just a few slides from a template or want to insert them in a different order.
When you start a new blank presentation, the Templates sidebar may open on the right side of the screen. (For some users, it doesn’t appear automatically; it seems to depend on the type of Google account you’re signed into.) You can open this pane at any time by clicking Insert > Templates on the menu bar above your presentation or clicking the Templates icon in the vertical mini-toolbar on the far right of your screen.
The Templates pane shows a series of templates for particular purposes, such as a project kickoff presentation or marketing plan presentation. Click a template’s thumbnail, and a series of thumbnails for individual slides within that template will appear in the pane. Click one of these slide thumbnails to add the slide to the presentation, where you can add your own information to it.
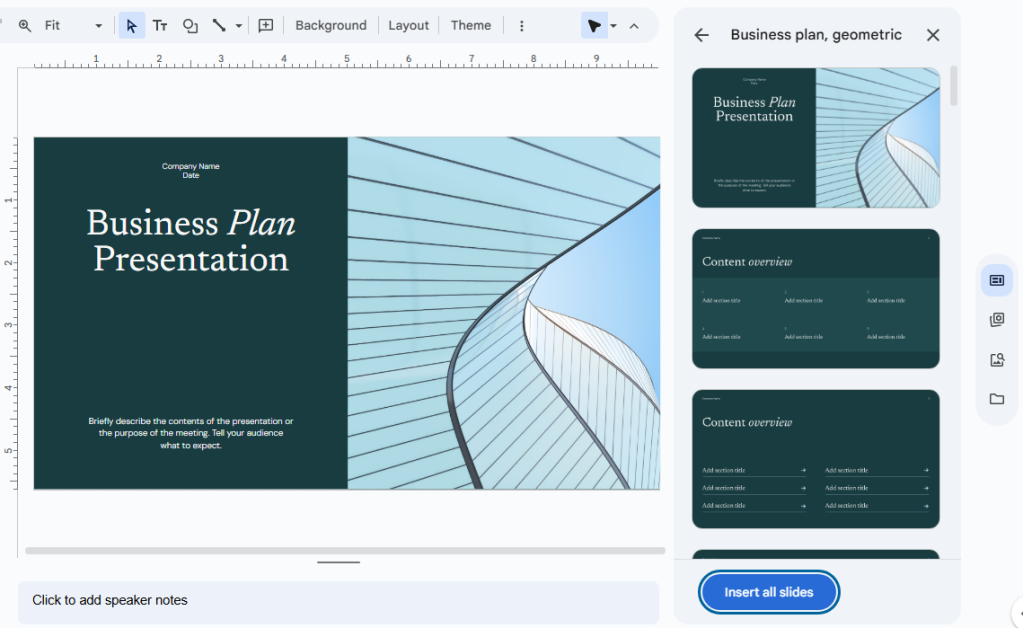
Adding slides from a template to a presentation.
Howard Wen / Foundry
If you decide you want to use all the slides in a template after all, just click Insert all slides at the bottom of the pane.
Use Gemini to create slides
If you have access to Gemini as described at the top of the story, you can prompt the AI tool to create a slide from scratch. You can then refine the content or customize the slide for your needs. Or you can prompt Gemini to generate a slide that’s based on the content of a document or email in your Google Drive or Gmail.
When you open an existing presentation, the Gemini pane will open in the right sidebar. Or you can open this pane at any time by clicking the Help me create a slide button in the top toolbar (next to the “New slide” button) or clicking the nova star icon at the upper-right corner. (If you’re using a free account or Business Starter plan, clicking the nova star icon instead shows an ad for Gemini with a button you can click to start a trial.)
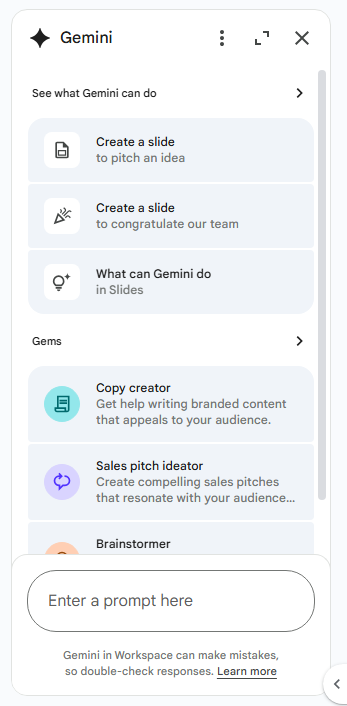
The Gemini sidebar offers suggested prompts.
Howard Wen / Foundry
To generate a slide: The Gemini pane will show a few suggested prompts that you can click. Otherwise, inside the chat box at the bottom of the pane, type a prompt that describes the kind of slide that you want Gemini to generate. If your presentation already has one or more slides with content on them, Gemini will try to create a new slide based on them.
Example prompts:
Create an intro slide that welcomes our new employees
Generate a slide with table listing sales figures for 4 months
You can trigger Gemini to use an email or file (a document, presentation or spreadsheet) that’s in your Gmail or Google Drive as the source to base the slide on. Try wording your prompt like one of these examples:
Create a slide that summarizes the spreadsheet “Third Quarter Budget Analysis”
Create a slide based on the email “Convention center schedule” that includes a summary of any attached documents
If Gemini is able to generate a slide from your prompt, the result will appear as a new slide overlaying your presentation. Click the Insert button below the slide to keep it; the slide will be added to your presentation. Or you can click Retry to have Gemini try again, or close the overlay and start with a new prompt.
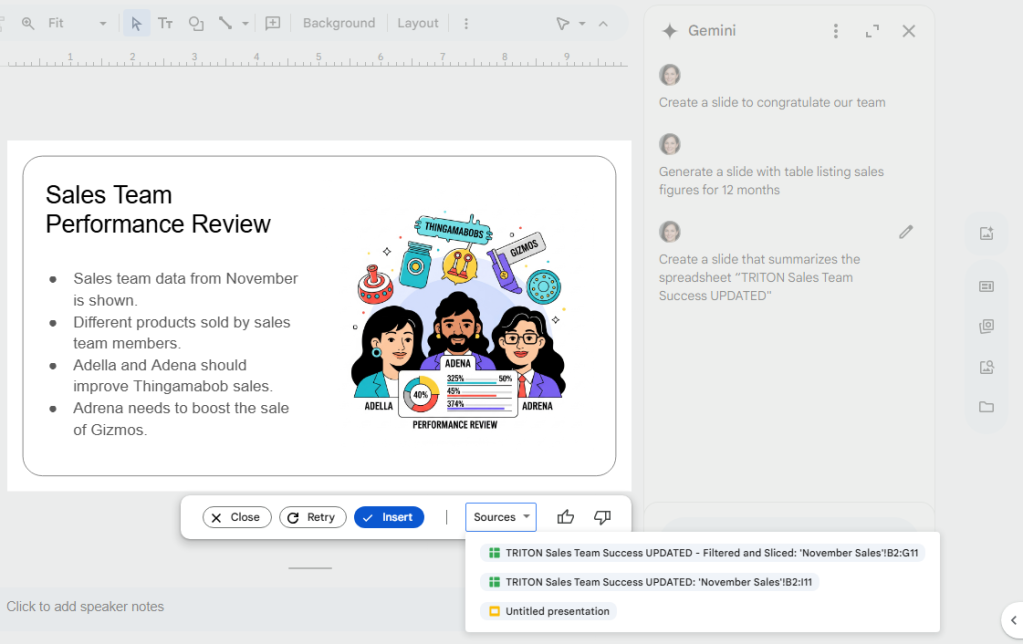
If you like the slide Gemini has created, click Insert to add it to your presentation.
Howard Wen / Foundry
Note: As of this writing, Gemini cannot generate an entire presentation for you from scratch – it can only create individual slides based on your prompts.
You can also use the Gemini pane for a variety of other tasks, such as brainstorming ideas, generating text, summarizing the content of a presentation, and much more. See “Google Workspace: 7 great ways to use the Gemini AI sidebar” for detailed instructions and use cases.
More tools to help you create slides
The mini-toolbar along the far right of Slides has icons for the following actions:
Create an image: If you Gemini is included with your Workspace plan, this icon appears above the mini-toolbar. It opens the Gemini pane discussed above, where you can prompt Gemini to generate an image. You can then add it as an object to the slide in the main window. Example prompts are provided in the pane.
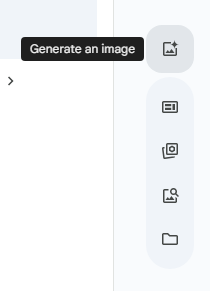
The “Generate an image” icon calls up the Gemini sidebar, where you can ask the AI to create images based on your prompts.
Howard Wen / Foundry
Templates: This opens the same Templates pane described earlier in the story.
Building blocks: These are templates of graphical objects that you can add to slides and then customize with your own text. In the sidebar, you can browse through the large selection of building blocks, which are grouped by category, such as Agendas, Lists, Key statistics, and Quotes. To select a building block, just click its thumbnail, and it will be inserted onto the slide in the main window.
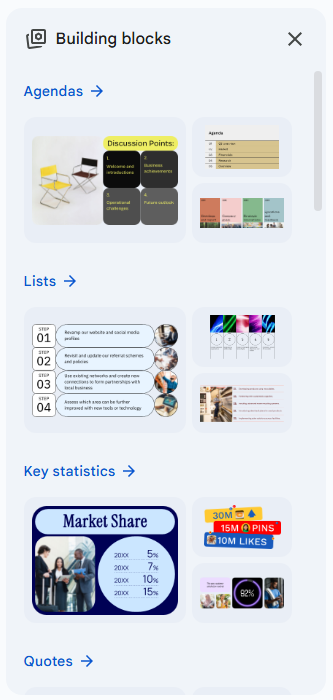
The “Building blocks” pane offers a variety of graphics templates you can insert and adapt.
Howard Wen / Foundry
Stock & web: This opens a pane with a wide selection of stock images, GIFs, and stickers, including images you can search for through Google. Just click the image you want to add it to the slide in the main window.
Drive & Photos: This opens a pane that lets you add an image that’s already stored in your Google Drive or Google Photos.
If you’re using Google Workspace under a paid plan, there are two more icons:
View and create recorded slideshows: This feature is covered in our companion article, “5 quick tips for Google Slides.”
Speaker spotlight: This opens a pane that lets you select a “spotlight” frame to add to a slide. This frame will open a live video feed from your webcam when you’re presenting. It’s meant to show your face as you discuss the slide.
Share and collaborate on a presentation
Presentations are often a group effort, with several team members contributing to and polishing a presentation. In Slides, it’s easy for multiple collaborators to work on a presentation together.
First, you need to share the presentation. Sharing a presentation in Google Slides works exactly the same way as sharing a document in Google Docs. See our Google Docs cheat sheet for complete instructions, including how to share the document privately or publicly and how to set access permissions.
As covered in that story, you can assign collaborators one of three access roles:
- Editor means they can change your document, add comments to it, and reshare it with other people.
- Commenter means they can view your document and add comments to it, but they cannot change it.
- Viewer means they can view your document, but they cannot change it or add comments to it.
The people you’ve shared a presentation with can view or work on it at the same time as you or at other times. Remember that people who have Editor privileges to your presentation can change all aspects of it. Having multiple people making changes to a presentation can become confusing.
So in many cases, setting everyone who you share your presentation with to Commenter is the best way to collaborate in Slides: People can attach comments to slides or to objects in a slide, but their comments won’t alter your presentation’s information or design.
Working with comments
To add a comment to a slide: Right-click its thumbnail in the left pane and select Comment toward the bottom of the menu that opens. Alternatively, you can select its thumbnail and select Insert > Comment from the menu bar, or click the Add comment icon (a speech balloon with a + sign) on the toolbar above your presentation.
A blank comment card with your name on it opens to the right of the slide in the main window. In this card’s entry line, type a brief comment, and when you’re finished, click the Comment button to insert it.
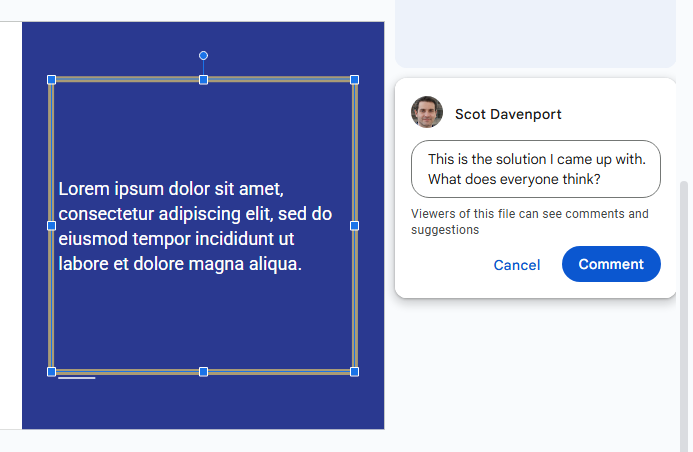
Typing in a new comment.
Howard Wen / Foundry
To add a comment to an object on a slide: Right-click the object (a block of text, chart, image, picture, etc.) and select Comment from the menu that opens. Alternatively, you can select the object by simply clicking it, and then select Insert > Comment from the menu bar, or click the Add comment icon on the toolbar.
To draw the attention of someone in your Google contacts to your comment: As you’re writing your comment, type the @ symbol and begin typing their name, then select the person from the list that pops open of suggested people in your Google contacts. They’ll receive an email notifying them of your comment and link to it.
To read, reply to, or remove a comment: A slide that contains a comment is denoted in the left pane with a number to the left of its thumbnail. This number represents the number of comments on that slide. Click the slide’s thumbnail to view the slide in the main window — all comment cards that have been added to it will open along the right of the slide.
To reply to a comment, click its card. The card will expand to reveal an entry line where you can type a comment in response.
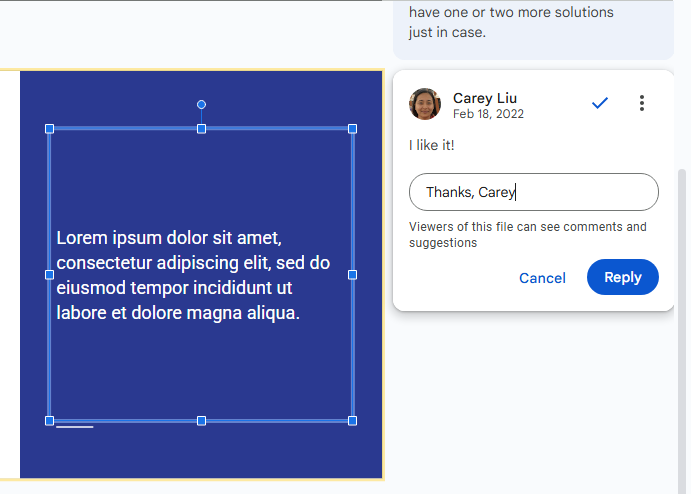
Replying to a comment.
Howard Wen / Foundry
Clicking the checkmark at the upper right marks the comment card as “resolved” and removes the card from the slide. Clicking the card’s three-dot icon opens a menu that lets you edit or delete your comment, or generate a shareable link directly to this comment card.
To see all comments in a presentation: Click the speech balloon icon that’s above your presentation and toward the upper right (to the left of the Slideshow button). The Comments pane will open along the right of the screen; it lists all the comment cards in your presentation.
When you click a comment card on this list, the view in the main window will jump to the slide where the comment is located and the comment card will be opened. You can reply to the comment from within the Comments pane or the comment card on the slide.
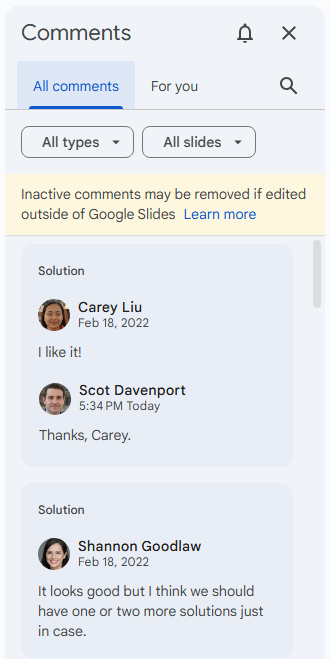
The Comments pane lets you quickly review all comments and jump to specific ones.
Howard Wen / Foundry
Resolved comments appear at the top of the Comments pane. You can restore a resolved comment to a slide: Move the pointer over the resolved comment card, click the three-dot icon that appears on it, and select Re-open from the menu.
Manage ‘live pointers’ when collaborating
If you and at least one person whom you’ve shared your presentation with are online at the same time working on your presentation, you can see their pointer moving on your screen, and they in turn can see yours. This “live pointers” feature can be helpful for guiding a person’s attention to the other person doing an action or pointing to something on a slide.
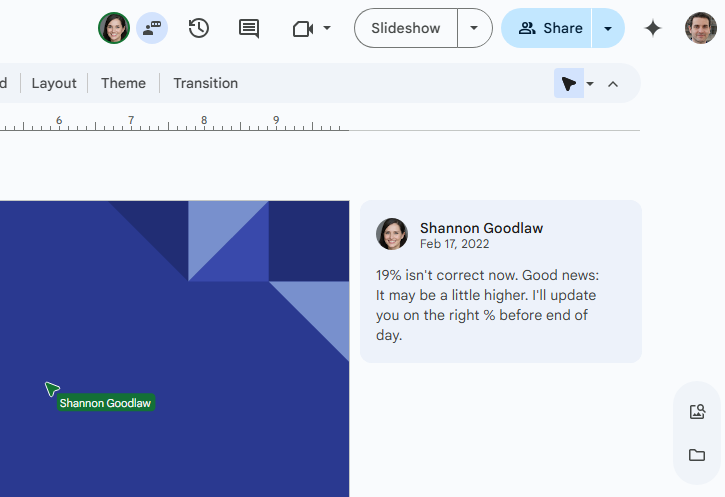
The “live pointer” shown at lower left highlights what a colleague is doing in a live collaboration session.
Howard Wen / Foundry
To turn your live pointers on or off: Click the arrowhead at the far right of the toolbar (below the Share button). If the arrowhead is an outline, this means that other people cannot see your pointer when you’re online with this presentation. If the arrowhead is solid black, then others can see your pointer when you’re online.
To turn your collaborators’ live pointers on or off: If you find others’ live pointers distracting, you can hide them. Click the tiny triangle to the right of the arrowhead. On the menu that opens, uncheck Show collaborator pointers. To turn them back on, re-check it.
An alternative way to collaborate on a presentation is to share it in Google Chat. See “5 quick tips for Google Slides” for details.
Recover older versions of a presentation
It’s easy to go too far when making tweaks to a presentation, especially when multiple people are making edits. Fortunately, it’s also easy to roll back to an earlier version of the presentation. To look up older versions of your presentation, click File > Version history > See version history or click the clock icon toward the right above your presentation.
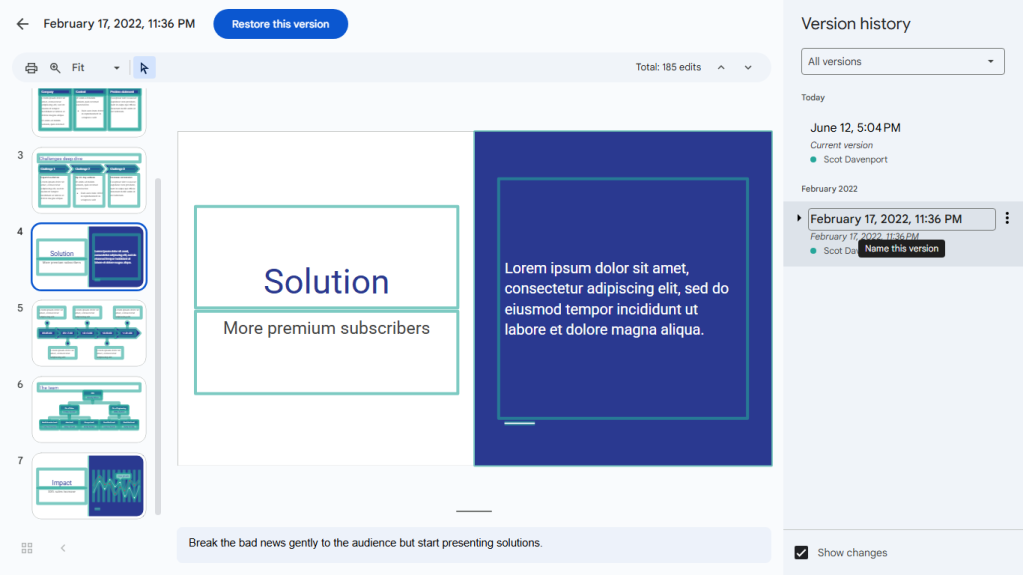
Using version history to view an earlier version of a presentation.
Howard Wen / Foundry
A pane along the right that shows a list of older versions of your presentation, organized by date and time. To see what an earlier version of the presentation looks like, click its date or version name in the list. That version will appear in the main window.
If you want to use this older version to replace the current version of your presentation, click the blue Restore this version button at the upper-left of the screen. This restored version will then appear at the top of the version history list.
If you want to give an older version a unique name, click its date. You’ll be prompted to type in words to replace the date. The version’s date and time will then appear in smaller type underneath its new name.
Give a presentation
When it’s time to present your slide deck to an audience, Google Slides has two modes: Slideshow and Presenter view. Slideshow mode essentially shows what your audience will see. Presenter view mode provides additional tools for your eyes only that run alongside Slideshow mode.
Slideshow mode: Click the Slideshow button at the upper-right corner of the screen. Google Slides will expand to full-screen view and show the slide that’s currently in the main window. (If you want to start the slideshow from the first slide in your presentation, click the down arrow to the right of the Slideshow button and select Start from beginning.)
When you move the on-screen pointer to the lower-left corner of your presentation, a control bar appears. You use this to click forward and back through the slides. Clicking the three-dot icon on this control bar opens a menu with other controls, such as starting auto-play and adjusting how quickly it moves from slide to slide.
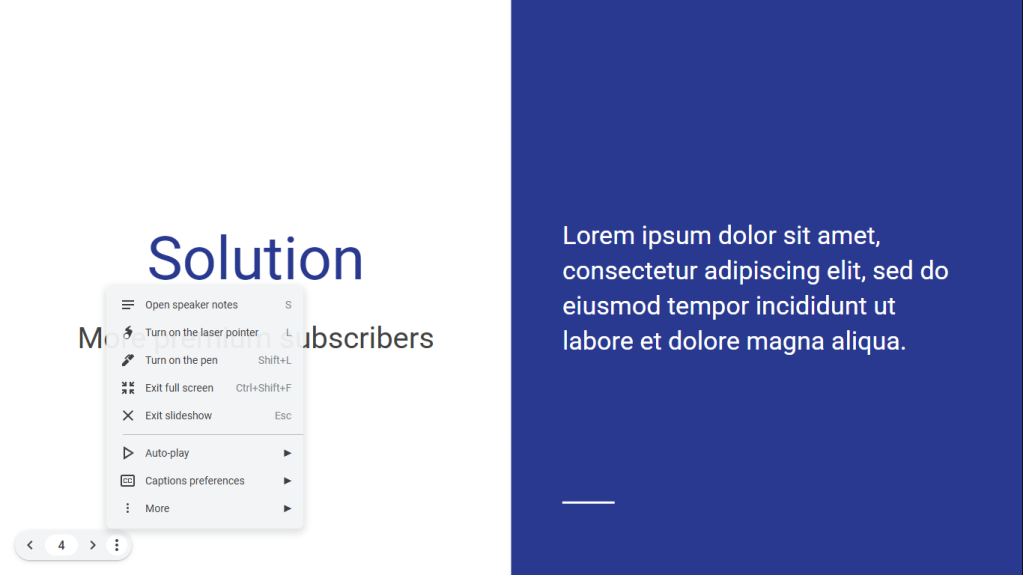
Slideshow mode shows your presentation in full-screen view. The control bar at lower left lets you click through the slides and take other actions.
Howard Wen / Foundry
Also on this menu:
- Open speaker notes takes your presentation out of full screen and opens a separate “Presenter view” window, as described below.
- Turn on the laser pointer turns the mouse pointer into a simulated red laser dot.
- Turn on the pen turns the mouse pointer into a drawing tool that you can use to draw on a slide. You can click the pen icon that appears on the control bar to change the color of the line drawn, or use the eraser tool to erase your drawings. Note that when you exit Slideshow mode, what you’ve drawn on any slide in your presentation will not be saved.
- Captions preferences — available only if you’re using a Chrome browser or Chromebook — turns on real-time, automatic transcription of the words you speak (English only) and shows them to your audience as on-screen captions.
Presenter view mode: Click the down arrow to the right of the Slideshow button at the top of the screen and select Presenter view. This shows the presentation in your browser window and pops open a separate browser window that assists you while you’re giving your presentation.
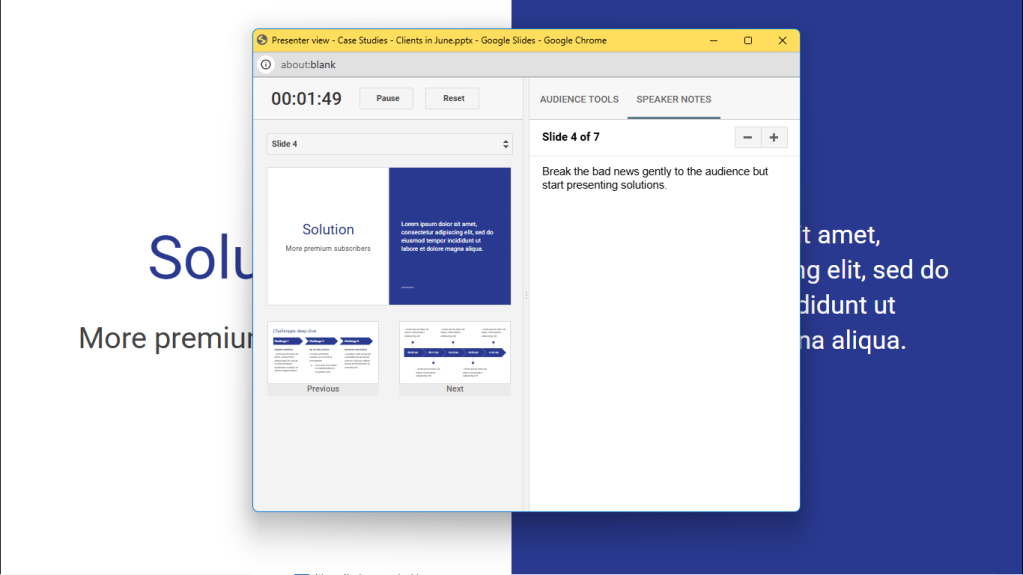
Presenter view lets you (but not your audience) see your speaker notes while presenting.
Howard Wen / Foundry
On the Presenter view window, there are various buttons that you can interact with to jump to any slide in your presentation, read the speaker notes you wrote for a slide, and control an audience Q&A feature (covered in “5 quick tips for Google Slides”). There’s also a timer that you can set to remind yourself how much time you’ve spent showing the current slide or the entire presentation.
Download and export a presentation
You can download the presentation and convert it to .pptx (if it’s not already a PowerPoint file), PDF, or OpenDocument (.odp) format. You can also save a single slide that’s open in the main Slides window as a JPG or PNG.
With your presentation open in Google Slides, select File > Download in the top menu bar and choose a file format. The presentation will be saved to your PC’s storage drive in that format.
Alternatively, you can select File > Email and then pick either Email this file or Email collaborators. This action will open a panel that lets you email your presentation as an attachment. PDF is the default, but you can click the PDF drop-down menu and choose Microsoft PowerPoint.
Use the Google Slides mobile app
With the exception of the “Version history” tool, the Google Slides app for Android, iPhone, and iPad has most of the same features described in this guide.
When you have a slideshow open, the toolbar at the top of the screen lets you take a variety of actions:
- To present your slides on your phone or tablet, on a Chromecast device, or in a Google Meet meeting, tap the right-pointing triangle icon.
- To share your presentation with other people, tap the headshot silhouette. (See “How to share from the Google Drive, Docs, Sheets, and Slides mobile apps” in our Google Drive cheat sheet.)
- To view all the comments in the presentation, tap the Comments icon (a chat balloon) if you see it on the toolbar. Or tap the three-dot icon and select View comments from the menu that appears.
- The three-dot menu also lets you see the presentation’s Q&A history, export it, make it available offline, and more.
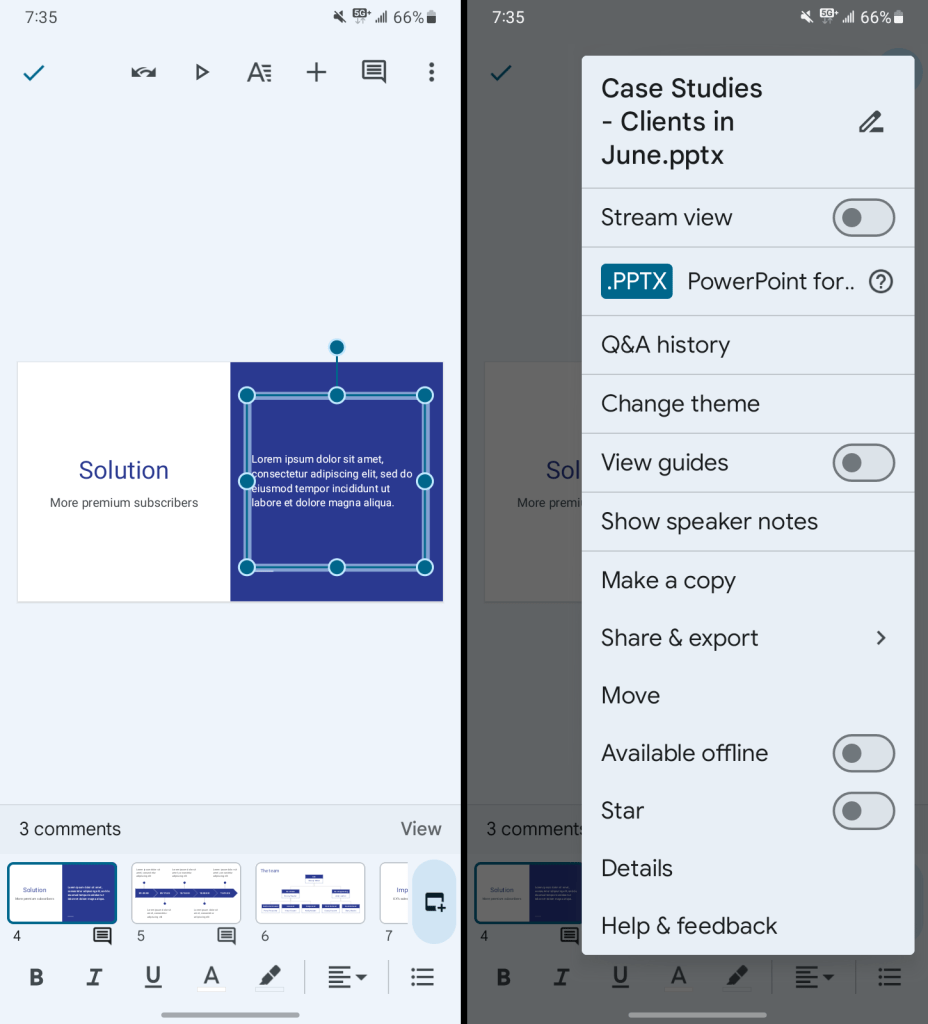
The Google Slides Android app.
Howard Wen / Foundry
To edit a slide, add comments to it, or view existing comments: Tap the slide. A menu bar will open below it that has the options Add comment and Edit slide. If there’s already at least one comment on the slide, you’ll also see View comments on the menu bar. (A slide with one or more comments will have a number at its upper right representing its total number of comments.)
When you tap the Edit slide option, you can then tap an element on the slide, such as text or an image, to edit it. Toolbars to edit that element will appear around it and along the top and bottom of the screen.
Any changes you make to your presentation in the mobile app are automatically saved and will appear the next time you open it in the Google Slides web app.
Use keyboard shortcuts
Save time in Slides by using keyboard shortcuts for common tasks. Below are some of the most useful to know. For more, select Help > Keyboard shortcuts from the top menu when you have a presentation open or press Ctrl + / (Windows, ChromeOS) or ⌘ + / (macOS).
Handy Google Slides keyboard shortcuts
| BASICS | ||
| Action | Chrome OS and Windows shortcut |
macOS shortcut |
| New slide | Ctrl + M | Control + M |
| Duplicate selected slide or object | Ctrl + D | ⌘ + D |
| Undo | Ctrl + Z | ⌘ + Z |
| Redo | Ctrl + Y | ⌘ + Y |
| Copy | Ctrl + C | ⌘ + C |
| Paste | Ctrl + V | ⌘ + V |
| Find | Ctrl + F | ⌘ + F |
| Add comment | Ctrl + Alt + M | ⌘ + Option + M |
| NAVIGATING AND ORGANIZING SLIDES | ||
| Action | Chrome OS and Windows shortcut |
macOS shortcut |
| Move to previous slide | Page Up or Up arrow | Page Up or Up arrow |
| Move to next slide | Page Down or Down arrow | Page Down or Down arrow |
| Move focus to first slide | Home | Home |
| Move focus to last slide | End | End |
| Move slide up | Ctrl + Up arrow | ⌘ + Up arrow |
| Move slide down | Ctrl + Down arrow | ⌘ + Down arrow |
| Move slide to beginning | Ctrl + Shift + Up arrow | ⌘ + Shift + Up arrow |
| Move slide to end | Ctrl + Shift + Down arrow | ⌘ + Shift + Down arrow |
| PRESENTING | ||
| Action | Chrome OS and Windows shortcut |
macOS shortcut |
| Present slideshow | Chrome OS: Ctrl + Search + 5 Windows: Ctrl + F5 | ⌘ + Return |
| Go to next slide | Right arrow | Right arrow |
| Go to previous slide | Left arrow | Left arrow |
| Go to a specific slide | Slide number, then Enter | Slide number, then Return |
| Go to first slide | Home | Home |
| Go to last slide | End | End |
| Open speaker notes | S | S |
| Open audience tools | A | A |
| Toggle laser pointer on/off | L | L |
| Exit Slideshow mode or Presenter view mode | Esc | Esc |
Ready to take your presentations to the next level? Check out “5 quick tips for Google Slides” for tips on creating custom slide layouts, recording your presentations, and more.
This story was originally published in September 2019 and most recently updated in September 2025.
Related:
Read more: Google Slides cheat sheet: How to get started